Overview
This article will cover the setup required in Softbase Evolution to create a standard NACHA file used for ACH Payments during the process of paying AP Invoices in the AP Payments Page.
Once you have setup the required information you would use AP Payments to select AP Invoices to pay in the Auto Payments tab in order to create a NACHA File.
The NACHA File that is produced currently handles ACH Credits (Payments to your Vendors) at this point and follows the standard format of a NACHA Export file.
If you are unsure if you Bank would accept a NACHA file for ACH Payments please review their website or work with a representative at your bank to verify they will accept it.
Prerequisites
- Setup Banking Information on your Chart of Account record for your Bank Account(s) that accept a NACHA file.
- Setup Banking Information on your Vendor record(s) that you are able to send ACH Payments to via a NACHA file.
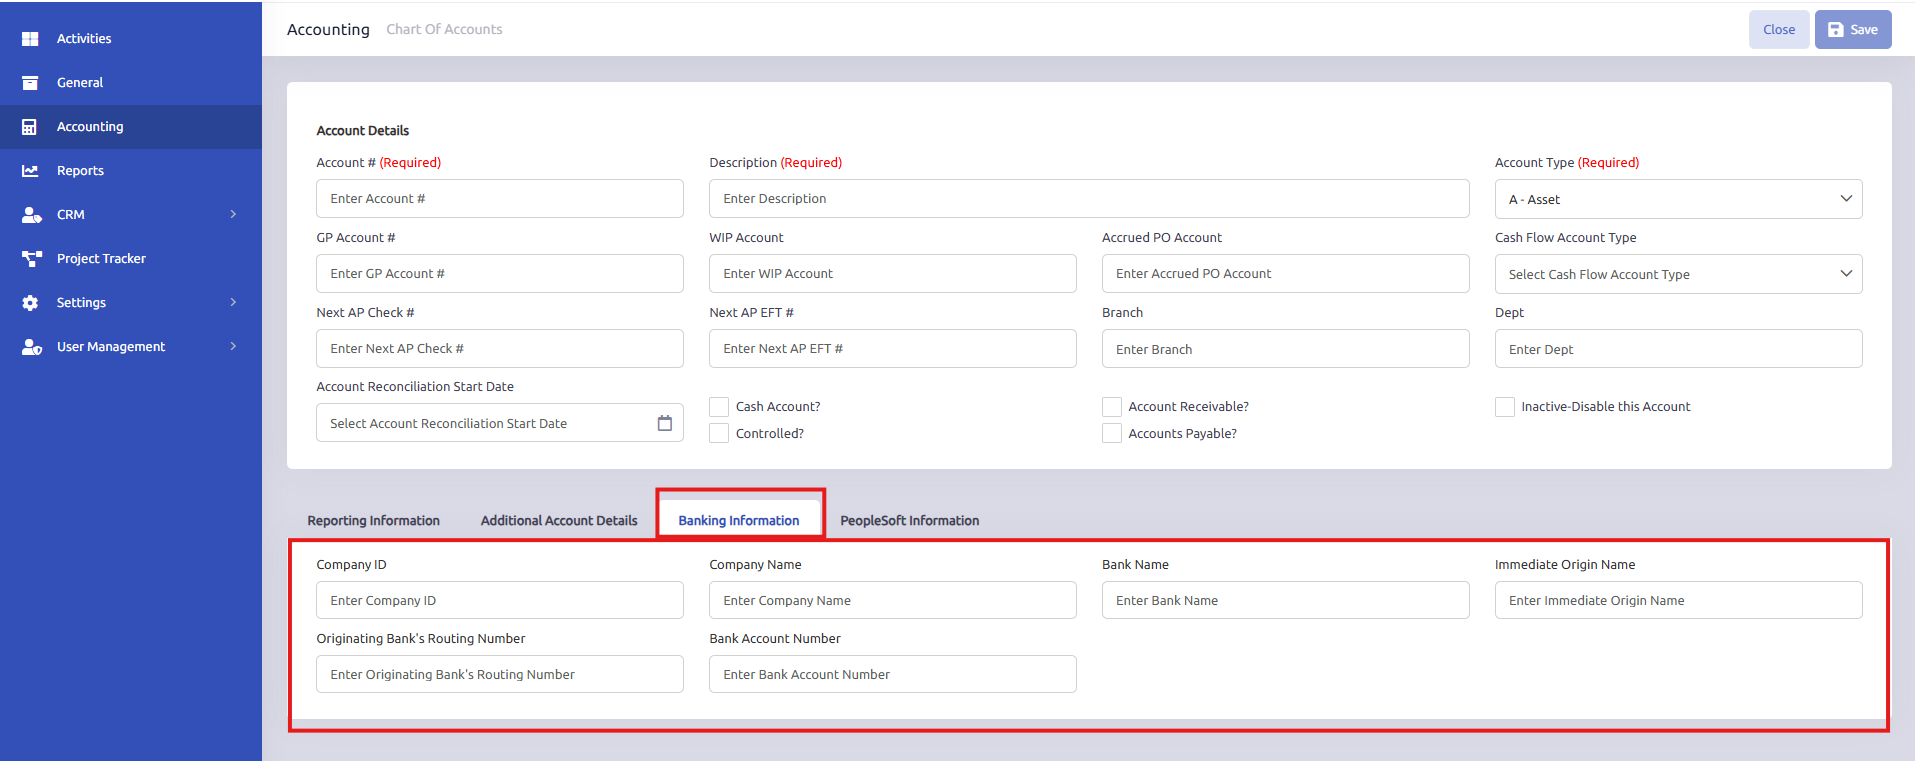
Chart of Account Setup
- Go to Accounting -> Chart of Accounts and select the Chart of Account record associated with your Bank Account that you will upload a NACHA file to.
- Populate the fields on the Banking Information Tab on the Chart of Account record for your Bank Account.
- This information would come from your Bank that you can submit a NACHA file to.
Vendor Setup
- Go to Accounting -> Vendor and select the Vendor(s) record that you will send ACH Payments to via the NACHA file uploaded to your Bank.
- Populate the fields on the Banking Information Tab on the Vendor record.
- This information would come from your Vendor that you can submit ACH Payments to.

Creating the NACHA File
- Go to Accounting -> AP Payments and select the Auto Payments Tab, Authorize the AP Invoices you wish to pay and then choose the Auto Check Tab.
- In the Auto Check Tab we recommend to use the Payment Type of EFT for the Bank Account that you want to generate the NACHA file for as you aren't actually printing any Checks for the ACH Payments that would be sent in the NACHA File.

- Once you have selected the correct Bank Account and Payment Type, choose to build the check run. This will gather up all invoices that will be paid and included in the NACHA File. Once you have done that you will now see a NACHA file option below.

- When you select the Export NACHA File button it will create the NACHA file and download to the default location from your browser.
- If the Bank Account or the Vendors included in the NACHA Export file don't have the Bank Information setup you will be prompted and the NACHA File will not be created as it will fail on the upload to your Bank.
- The file that is downloaded to your machine is called; NACHA_YYYYMMDD
- At this point you would navigate to the folder where the File is located at then upload it to your Bank.
- Once you have approval from your Bank the file has been uploaded properly and will be processed you can choose to Print the payments and save to a PDF and then Post the Payment as you normally would have for Checks.
Was this article helpful?
That’s Great!
Thank you for your feedback
Sorry! We couldn't be helpful
Thank you for your feedback
Feedback sent
We appreciate your effort and will try to fix the article