1. Navigate to the Purchase Order Program.
Select the Branch and Parts Department from the drop down menus. Enter the Vendor number as the INTERNAL dealer vendor number.

2. Click "Next PO #"

3. Click "Save"

4. Click the Parts tab in the Purchase Order. Enter or search for the correct part number that needs the on hand quantity updated.

5. Click the "Qty *" field and enter the quantity of parts.

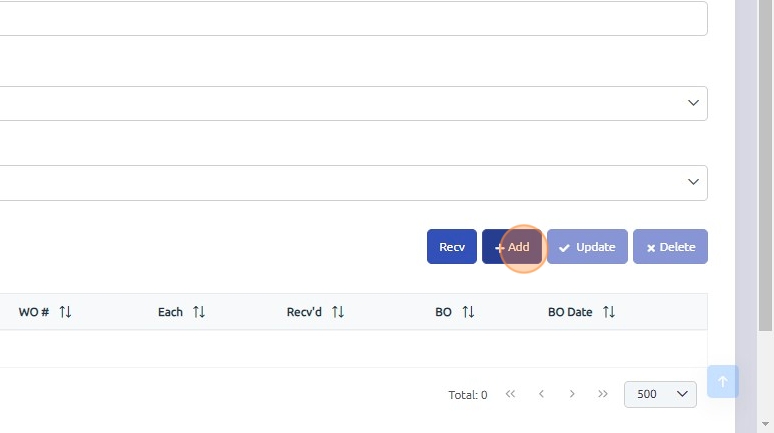
6. Click "Add"

7. Select the line item and Click "Recv"

8. Select the line item.

9. Click "Receive"

10. Click "Close"

11. Once the purchase order has been received, the On Hand Quantity will automatically update. However, to ensure the costs are properly reflected in your financials, the costs need to be imported to the parts inventory account by entering an Accounts Payable (AP) Invoice.
Click "AP Invoice Entry"

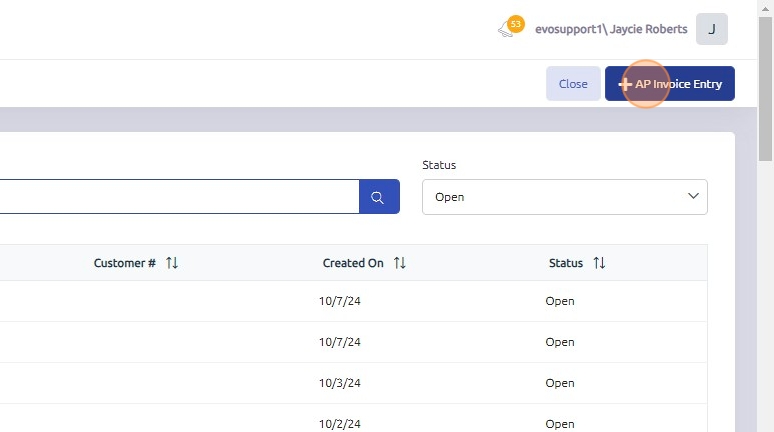
12. Click "+ AP Invoice Entry"

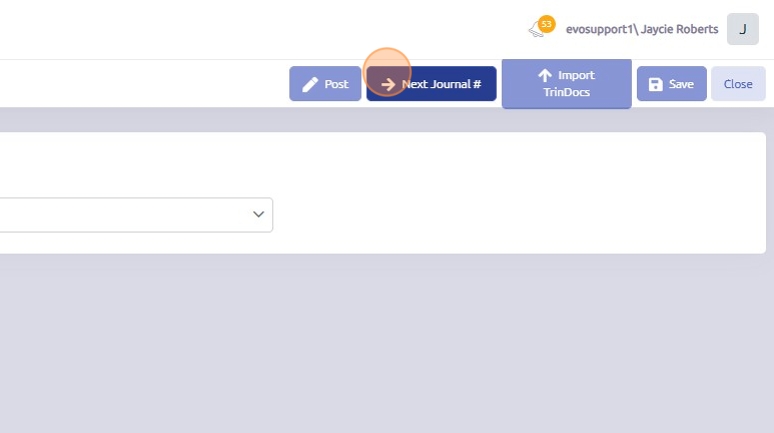
13. Click "Next Journal #"

14. Click "Save"

15. Enter the Vendor # (INTERNAL).
Enter the AP Invoice # (false invoice number is ok as long as it has not been previously used.)
Select the correct Payables account.
Enter the associated PO# the parts were received on.

16. Click Add

17. Click "PO Import"

18. Click "Import"
When an AP Invoice is imported, it gets distributed to the inventory account associated with the warehouse that the relevant parts belong to. This ensures that inventory costs are accurately tracked in the correct accounts for each warehouse.

19. Click "Post"

Was this article helpful?
That’s Great!
Thank you for your feedback
Sorry! We couldn't be helpful
Thank you for your feedback
Feedback sent
We appreciate your effort and will try to fix the article